Spirometry is the most commonly performed test of pulmonary function and it plays a central role in the diagnosis and surveillance of respiratory disease. Accurate spirometry testing, interpretation, and follow-up are vital to ensure patients are diagnosed correctly, placed on the correct treatment pathway and monitored effectively.
Although the principles for achieving accurate and repeatable testing seem simple, performing accurate testing has many obstacles some of those most common are outlined below.
Patient demographics
It’s vitally important when performing spirometry that the correct demographics’ information is obtained prior to starting the test. This includes the patient’s date of birth, birth gender, height, weight and ethnicity.
It is important that all this information is recorded correctly as it will have a significant impact on the interpretation of the test. In some centres with busy clinics, patients’ height may be measured with shoes on, or be estimated by the patient. This will give false predicted values and have an adverse effect on the interpretation, whereby you are most likely to see a false-positive result. Patients who are unable to stand should have their height estimated by the correct arm span equations.
The birth gender and date of birth are also crucially important, but common mistakes when performing Spirometry include the gender being input incorrectly. It’s extremely important this information is checked by the performing physiologist and/or health professional, prior to starting the test.
Confirming the patients’ ethnicity is also important, as the Global Lung Initiative have further developed correction values related to ethnicity, which should be available within your Spirometry software.
Calibration
Calibration is vitally important when performing measurements of flow and volume, regular and accurate calibration helps those performing spirometry trust the results generated.
Formally calibration is the process for establishing the relationship between sensor-determined values of flow or volume and the actual flow or volume. A 3-L calibration syringe is used to carry out calibration checks, this is the process used to validate that the device is within calibration limits, e.g. ±3% of true value. Calibration checks must be undertaken daily or more frequently if there are large temperature changes within the test area or if specified by the manufacturer.
To help reduce test errors, a calibration log should be recorded, and equipment which cannot successfully be calibrated should not be used. Biological controls, whereby a member of the laboratory staff regularly performs spirometry, helps further reduce the risk of equipment or calibration faults. There are also devices now available which are supplied with pre-calibrated flow sensors which saves valuable time within buy clinics, these can be verified by using the calibration syringe to maintain Quality Control.
Hesitation and or Slow start
Spirometry is a test of maximal effort, therefore, a slight hesitation or a delayed start can affect results, and so is one of the common mistakes when performing Spirometry. A hesitation in blowing out before the initial blast affects most spirometry test results early in the manoeuvre. Similarly, a test which is performed slowly or in a will have a delayed peak flow and in circumstances will falsely elevate the FEV1 – affecting test interpretation.
A manoeuvre showing these errors must not be used to measure FEV1, but it may be used to validate the FVC if it is consistent with other acceptable but less than perfect curves.
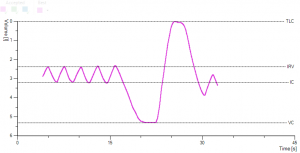
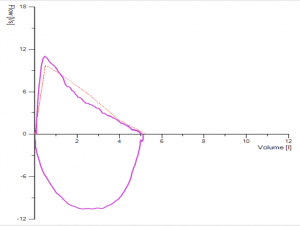
Since hesitation and or a slow start occurs early in the test, it is most easily seen in the flow-volume curve, which has its peak flow displaced to the right.
Hesitation can falsely elevate the FEV1 and allow for misinterpretation of the flow-volume loop.
In instances where this occurs, the subject/ patient should be asked to blow immediately or encouraged to blow with more force.
a.) 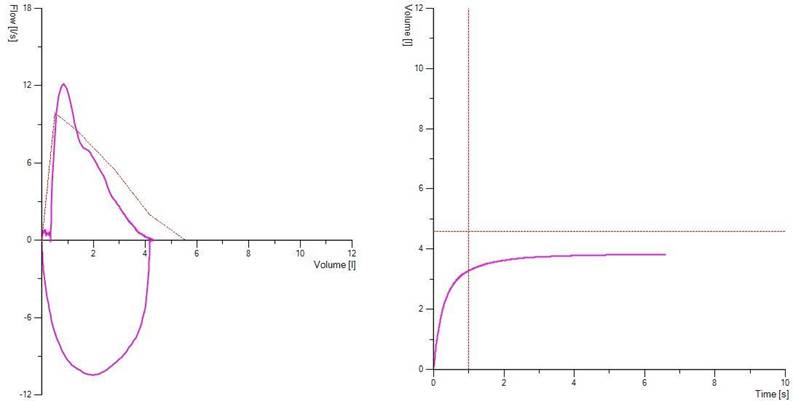
b.)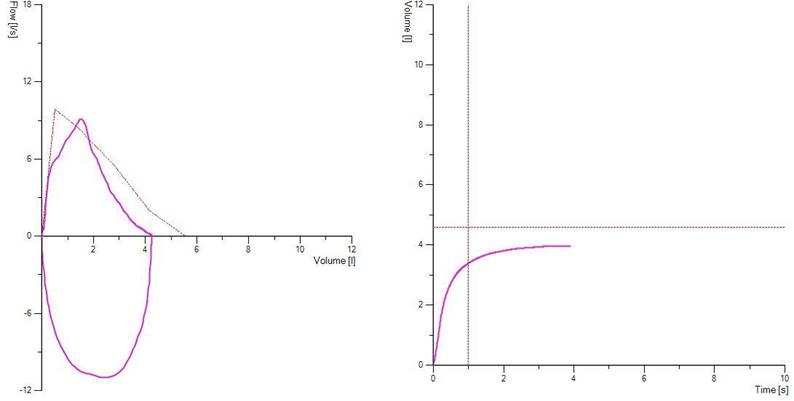
Figure 1. Demonstrates a clear hesitation before exhalation in picture a) due to the patient breath-holding before blasting out and in b) slow to reach peak flow. Both types of errors will affect FEV1 and these traces as such should be discarded
Test selection
Common mistakes when performing Spirometry include incorrect test selection. This is made whereby non-acceptable or non-repeatable manoeuvres are selected, this error can often be made by novices or those who perform spirometry infrequently.
This can happen when those performing the test are more focused on the numerical data and not the flow-volume curve.
With changes in technology, the use of flow-volume curves is commonplace, but some centres may still use volume time curves (whereby cough can be less easily identified).
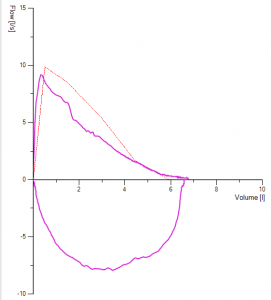
Poor test selection can quite often lead to false-negative or false-positive results. If you see the result below here, FEV1 is performed within ATS criteria for reproducibility, but we see an unacceptable manoeuvre with cough present, which has the highest FEV1. The selection of tests should not solely be focused on the highest attained numbers for FEV1 and FVC but should be performed with technically accepted manoeuvres free from significant artefact.
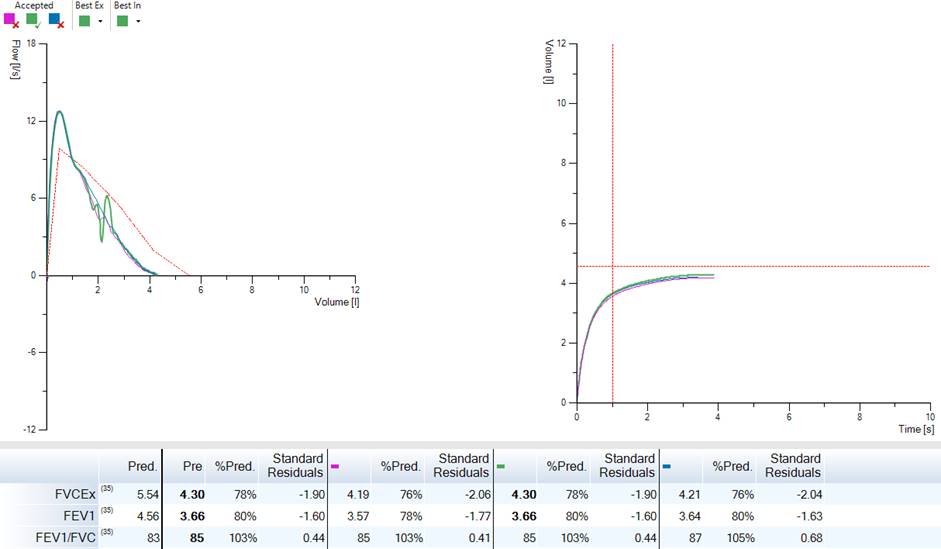
Figure 2. Demonstrates three manoeuvres with reproducible numbers for FEV1, however, the best-selected test had a cough – and it’s not a technically acceptable test the numbers for this although the best attained should not be used.
Glottis Closure or Breath Holding
Commonly you can see airflow during exhalation suddenly cease before the lungs have been completely emptied.
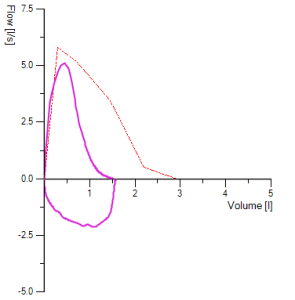
Closing the vocal cords (glottis closure) and breath-holding both causes the volume-time curve to show an abrupt horizontal line. The flow-volume curve drops sharply to zero flow. This is another common mistakes when performing Spirometry.
The FVC is falsely reduced and may be misinterpreted as indicating a restrictive impairment. In addition, the FEV1/FVC ratio may be falsely elevated, resulting in a normal FEV1/FVC ratio even hiding a potentially obstructive impairment. Aside from this as the patient continues to blow there would be a distinct loud noise as the patient attempts to carry on blowing through a closed glottis.
Glottis closure may be involuntary and should be documented when it cannot be corrected. However, for breath-holding, it’s important to coach the subject/patient to blow ‘UNTIL TOLD TO STOP’, or encouraged to relax the throat and squeeze from the diaphragm until empty, glottis closure can be difficult to correct, a slow vital capacity may be beneficial and help validate vital capacity.

Figure 3. Demonstrates glottis closure, seen by a sudden drop in the flow volume loop to 0 flow and in the volume time graph by a distinct plateau. Here we can see the patient had attempted to carry on the blow this would most likely be a noisy part of the manoeuvre.
Want to Learn More?
If you are interested in finding out more about our range of Spirometry and PFT products, why not drop our sales team a message at sales@lovemedical.com or give us a call on 0161 976 2744 and one of our team will be happy to talk to you!
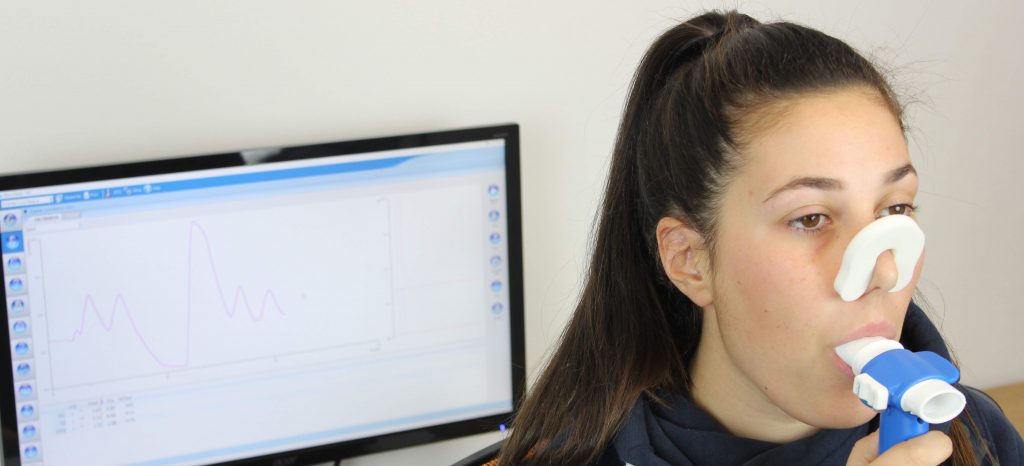
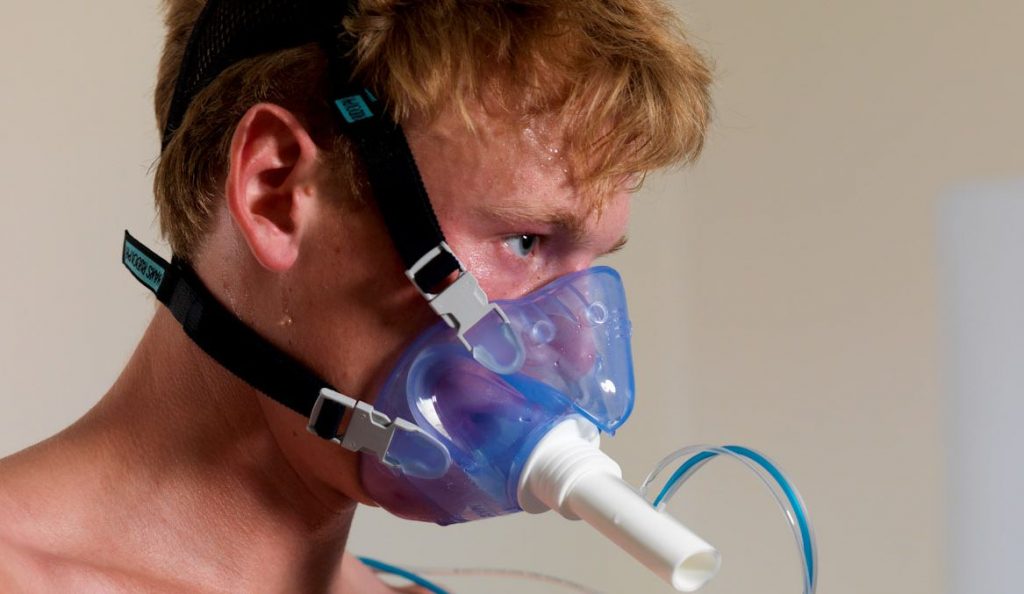
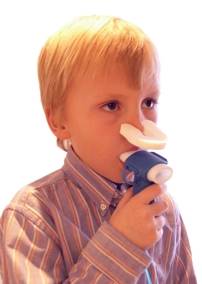 Spirometry manoeuvres should be performed with the subject in a sitting position, and the tests require the subject to breathe through a flow sensing device in several predetermined manoeuvres. The patient should use a nose clip to ensure air is blown through the mouthpiece.